

Why Role Management Matters
Custom roles help you:
👥 Delegate tasks efficiently.
🛡️ Maintain security with least-privilege access.
⚙️ Streamline workflows for team collaboration.
📊 Control content ownership and editing rights.
Default Roles Overview
-
Admin
-
Full access to all features.
-
Can manage all users and content.
-
-
User (Default)
-
Can only view/complete assigned courses.
-
No creation or editing capabilities.
-
Creating Custom Roles
Step 1: Access Role Settings
-
Go to Admin Dashboard
-
Navigate to Settings > Roles & Permissions
-
View existing roles list

Step 2: Add New Role
-
Click "New Role"
-
Enter Role Name (e.g., "Content Editor", "Course Creator")

- Click "Add Role"
-
Click on the Role name and select permissions(click on the toggle to enable the chosen ability):
| Permission | Description |
|---|---|
| Create Courses | Can make new courses but not edit others |
| Manage Courses | Can edit existing courses but not create new ones |
| Create & Manage | Full course management capabilities |

Managing Existing Roles
Delete a Role
-
Find role in list
-
Click trash can icon

-
Confirm deletion

⚠️ Note: Users assigned to deleted roles revert to default "User" role
Assigning Roles to Users
-
Go to Users Dashboard
-
Select user
-
Navigate to Roles tab
-
Choose role from dropdown
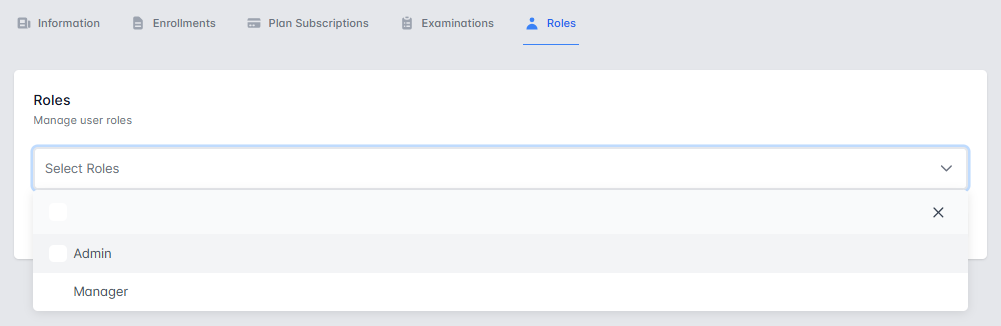
-
Save changes by clicking on "Assign Role"

Use Case Examples
-
Course Creator Team
-
Permission: Create Courses
-
Can draft new courses but not alter existing ones
-
-
Quality Assurance Editor
-
Permission: Modify Courses
-
Can review and improve existing content
-
-
Department Manager
-
Permission: Create & Modify
-
Full control over their department's courses
-
Best Practices
✔️ Start restrictive - Grant minimum necessary permissions
✔️ Use clear naming - Avoid ambiguous role titles
✔️ Audit regularly - Review role assignments quarterly
✔️ Document roles - Maintain a permissions matrix