Why Custom Fields Matter
Custom fields empower you to:
📊 Gather demographic data (gender, age, location).
🎯 Personalize user experiences.
📈 Analyze audience segments.
📝 Collect specialized information (company name, skill level).
Example Use Cases:
-
Track gender distribution in courses.
-
Segment users by job title.
-
Collect language preferences.
-
Gather educational background.
Step-by-Step Guide
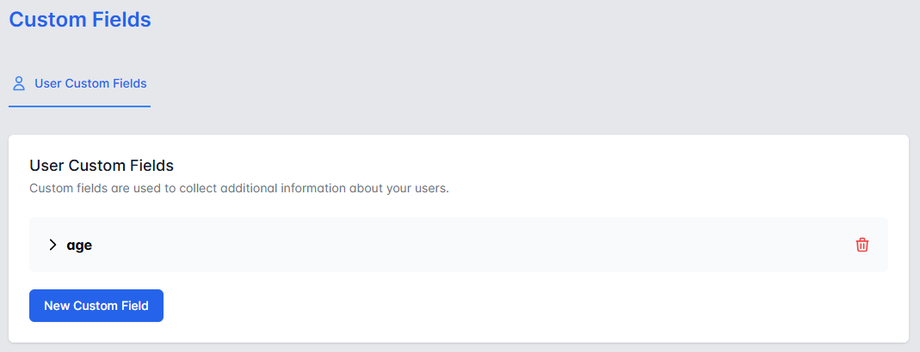
1. Access Custom Fields Settings
-
Log in to Admin Dashboard
-
Navigate to Settings > Custom Fields
-
View existing fields or create new ones
2. Create a New Custom Field
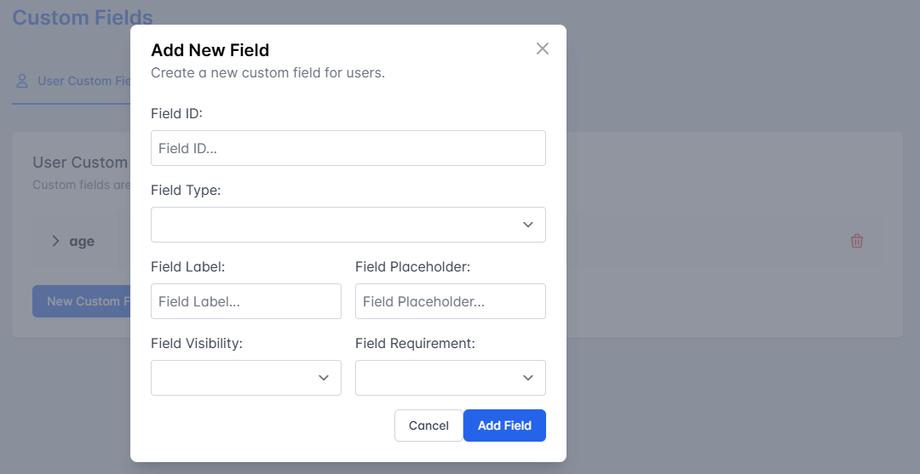
Click "New Custom Field" and complete:
Unique ID (internal reference, no spaces/special chars)
-
-
Example:
user_gender
-
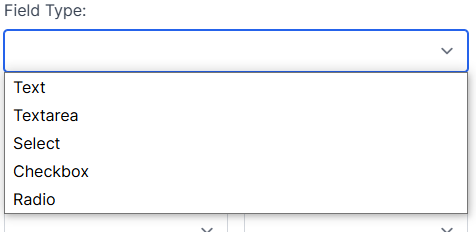
Field Type (choose one):
-
-
Text (single-line input)
-
Textarea (multi-line)
-
Select (dropdown)
-
Checkbox (multiple selection)
-
Radio (single selection)
-
Field Label (what users see):
-
-
Example: "Gender"
-
Placeholder (optional):
-
-
Example: "Select your gender"
-
Requirement:
-
-
Required (must be filled)
-
Optional (can be skipped)
-
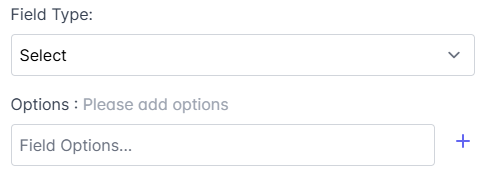
Additional Options (for select/checkbox/radio):
-
-
Add all possible choices (e.g., Male, Female, Other)
-
Click "Add Field" to save.
Managing Existing Fields
Delete a Field
⚠️ Warning: Deleted fields permanently remove all collected data for that field
Best Practices
✔️ Plan ahead - Decide what data you really need
✔️ Keep it simple - Don't overwhelm users during signup
✔️ Use clear labels - Avoid ambiguous field names
✔️ Test thoroughly - Check all field types work correctly
FAQs
Q: How many custom fields can I create?
A: No hard limit, but we recommend ≤10 for best UX.
Q: Can I make fields visible to only certain user roles?
A: Yes! Configure in Field Visibility.


